Showing posts with label DIY. Show all posts

Tuesday, April 3, 2012

diy: colorblock sandals

Inspired by this wrapped tribal choker project from the ever-fierce Aimee at SwellMayde, I gave some plain brown platforms a little facelift:


I wrapped the embroidery thread per Aimee's tutorial, opting just knot the ends tightly to secure them at each end:


This is such a neat, simple technique for updating accessories.  Why not try it on your sandal straps, belts, purse handles, and various pieces of jewelry?  And it confers a significant bonus when used on shoes, adding a welcome layer of cushy padding!  Woot!

Saturday, March 17, 2012

diy: silk crop top

[Weird things have been happening with Google Friend Connect, and some of the cool kids are murmuring that it may soon be a thing of the past for all.  So if you like what you see here, please follow me on Bloglovin!]

Like everyone else, my sights are firmly set on warmer-weather dressing.  This breezy crop top is one of my faves, equally perfect with cutoffs/sandals or a pencil skirt and blazer:


Otis Maclain blouse

Inspired by the shape of this top, I did a little operation on this oversized thrifted silk shirt:

Before


After


What I did:
1. Drew a curved hemline (yeah, I'm an addict) on the inside of the shirt, then sewed a line of stitches along that curve.
2. Cut off the bottom of the shirt about 3/4 inch below the line I had just sewed.
3. Carefully pressed the hem up so that the line of stitches was just slightly on the inside of the shirt, then folded the hem in about 1/4 inch and pressed that one more time with steam.  This helps manage the wonkiness of the curved hem and gathers the resulting excess material before you finish the hem.
4. Stitched the hem down in place.
5. Took in the sides a bit to create slightly more triangular shape.

I decided to just roll up the sleeves instead of cutting them off, as I like the option of having sleeves for a little coverage when the sun is just too much.  I'm ambivalent about whether to keep the pointed collar, though - what do you think?  Should it stay or go?

Friday, March 9, 2012

diy: passport cover

I had the day off yesterday and was eager to spend my time knocking out a dress makeover project.  FAIL.  Five hours into the task and it was a disaster.  Empty-handed, I rifled through my materials stash and commanded myself to come up with something redeeming - easy, no more than 30 minutes, etc.  The result: a quick sleeve to protect my passport from those harsh airport elements.


I made use of leftover materials seen here and here, and I get to take this baby for a spin this very day!  Follow the instructions after the jump and be prepared to dazzle border patrol.

Wednesday, February 29, 2012

diy preview

A quick peek into my latest project in process.  No worries!  It may be a wack pile of fabric now, but I promise it will look pretty good when it's done, or at least that I will think so (that counts, right?).


In the last week, I've been consumed with moving...my third time here in Madrid.  But I've finally hit the jackpot - I have a sweet little study, perfect for use as a DIY lab! - and am feeling settled in.  Hope you're having a great week!  Check back soon for the scoop on this project.

Tuesday, February 21, 2012

diy: scarf-panel sweater

Here's the paneled sweater project I promised in my last post.  I feel like I'm always spewing some variant of "Omg guys, this project could not be simpler!!!" but really, it's true.


These days, I'm trying to focus more than ever on quality - not just when vetting new wardrobe additions, but also when making/updating garments myself.  I'm not interested in adding any poorly-constructed items to my closet, whether they were made by me or someone else - if something is crappy, I'm going to feel cheap and far from chic when wearing it.  So I'm devoting a little extra time and attention to my workmanship (e.g., slowing down while sewing, undoing mistakes and starting over when needed), rather than racing through projects and checking them off the list, as I tend to do.  This project certainly didn't turn out perfectly, but the result is vastly better than it would have been if I'd let my manic-DIYer self take over.

Process pics and steps after the jump...

Wednesday, February 8, 2012

diy: tribal print flats

I've been in need of a healthy outlet for my tribal-print obsession, so I went crazy on a pair of old flats.  These shoes had served me very well, and I like having neutral flats at my disposal, but the leather finish was on its last legs.  Here's what I came up with:


Notes on this DIY after the jump!

Sunday, January 29, 2012

diy cowl scarf / working with what you've got

If you've taken a look at some of my projects (and if you have, thank you!), you know I'm big on reviving old garments.  I made this cowl scarf from a thrifted knit skirt that just didn't fit, simply cutting out a tube, sewing it into a funnel shape, and stitching the edges down.  Because I opted for the funnel shape, it fits a little closer at the neck, the way I like it.


I know we all have some excellent raw materials in our closets, so I wanted to share a couple of links to some favorite overhaul-related projects from blogland.  Most of them involve relatively simple techniques and thus don't require advanced sewing skills or a lot of special equipment (a hand-sewn pencil skirt, what?).  More importantly, these projects are great inspiration for looking at your older/thrifted clothing in a new light and coming up with new ways to make them work for you.   

Tops/jackets


Skirts

Elastic-waist skirt from men's button-down - Megan Nielsen Design Diary
Silk skirt from granny dress - Le Fanciulle

Shorts

Shorts from leather pants - A Pair & a Spare
Button-detail shorts from pants - Dress Me Up, Buttercup

Accessories

Tube scarf from sweater - studs and pearls
Hat from sweater - Crochet Clouds
Bag from scarf - Little Projects in Style
Arm warmers from socks - Runway DIY

I hope these have lit a fire under that ass of yours.  Now go crank out something fabulous!


Wednesday, January 18, 2012

diy: blue mini

Since my last real closet purge and move to Spain, I haven't gotten much use out of a favorite thrifted skirt, a glimpse of which appears here.  Classic as they may be, I'm no longer sure that pencil skirts are a true style staple for me, and I've been craving just a few items that are slightly more...saucy?  So, I decided to update this skirt, shortening it into a mini with a slightly curved hem:


Quick steps after the jump!

Friday, January 6, 2012

diy: metallic triangles

On a recent thrifting run, I spotted this fitted, metallic gold/black crewneck top, which is so not me:

Though I'm pretty sure that many fashion bloggers would make it look fly, this particular piece was clearly not headed for this girl's closet.  However, I knew that it would make a good raw material for something else, and I had a comfy but soporific black sweater in need of updating.  Thus, this easy and sewing machine-optional revamp:


Materials:

- Sweater, sweatshirt, or whatever top you want to use as the main garment
- Fabric - here, another top
- Sewing machine or needle/thread
- Fabric glue (optional)

Steps:

1. Cut out 2 triangles from your fabric, leaving an extra 1/2" as an allowance on each diagonal side.  If you're cutting the triangles from a top, the side seam should run down the center of each triangle.  My triangles measured 13.5" (sides) x 15" (base) x 11.5" (height).
2. Along the sides of each triangle, fold down the extra 1/2" allowance towards the underside of the fabric.  Press.  Because the fabric I was using was synthetic and difficult to press effectively, I used fabric glue to secure the allowance.
3. Arrange each triangle so that the middle is aligned with the side seams of the main garment - this is easy to do if you cut the triangles out of another top, since you can just match up the side seams of the main garment and triangles.  
4. Hand- or machine-stitch the triangles in place.  Again, I attached the triangles to the sweatshirt using just a bit of fabric glue to keep everything tidy before sewing.  

Easy projects like these, using thrifted pieces and/or pieces from your current wardrobe, are so damn satisfying!  I'm an addict for sure.

Saturday, December 31, 2011

diy: toasty feet

Another half-cautionary tale: when preparing to revamp a thrifted sweater, read that label carefully! Don't throw it hurriedly into the washer on the hot setting without confirming its lack of animal fibers - in this case, wool. I guess that eliminating cooties, rather than preserving the fabric, was at the forefront of my mind at that moment. Thus, the lovely grey v-neck for which I'd had grand plans became a toddler-sized felt pullover.


Of course, the resulting felt wouldn't go to waste. Since I was just about to head off on a holiday vacation around Europe for a few weeks - lots of walking to be done outside - I made some wool insoles to stick in my shoes for an extra layer of warmth.


Steps:

1. Felt (intentionally or not) a wool or other animal-fiber sweater by washing it in hot water and then running it through the dryer.  Heavier sweaters work great for this, as they should produce a nice, thick felt.  As suggested here, protect your washer and dryer by putting the sweater in a mesh bag first.
2. Make a template by tracing around an existing insole (check some of your flats for insoles that can be pulled out) and cutting out the shape.
3. Pin the template to the felt and cut. Put the insoles in your shoes and start trekking.

If your felt feels too flimsy, or you just want something thicker, you can cut out several insoles and glue or sew them together.

Happy 2012, and cheers to a DIY-full year!

Friday, December 9, 2011

diy: chiffon-edge leather collar


Just a quick post before kicking off a lovely weekend in Venice!  This is (obviously) another take on the good old collar necklace project.  I simply 1) used the collar from a favorite white shirt as a template and cut the collar shape from a piece of scrap leather, adding about 1/4 inch at the top, 2) folded down and glued the extra material at the top, and 3) sewed some chiffon around the edges, exactly as I did here.

I've been trying to be better about squeezing in DIY time into my erratic, all-over-the-place schedule, with decent results thus far, so more projects are definitely to come.  In the meantime, I'm off to enjoy La Serenissima for a bit.  Hope you have a fantastic weekend!

Wednesday, November 30, 2011

diy: leather-trim pocket sweater

When I really like an idea, I work it to death. One of the first projects I posted on this blog was a linen tee to which I’d added a curved hemline and a bit of pocket adornment. Now that’s it’s cold, I applied the exact same template to give new life to a thrifted wool sweater. Thus, my summer tee now has a super-cozy big sister! And, as I’ve previously divulged, I have a full-on obsession with attaching pieces of scrap leather to everything in sight, so slapping some leather on this sweater was more or less inevitable.


Instructions after the jump!

Monday, November 21, 2011

inspiration: leather details


You know that thrifted leather skirt that I raved about the last post?  It is undergoing reincarnation as we speak.  And it gets to live on not as a single garment, but as a component of several!  If I were an old leather skirt with a busted seam, I would choose this as my fate for sure.

As a prelude to the next few leather-associated DIYs, here’s a peek at some of my latest inspiration:


inspiration: leather details 


So simple and cozy, and just a bit luxe.

Next up: Grandpa’s wool v-neck, revamped!


Tuesday, November 15, 2011

diy: leather pendant


This short and sweet post over at OutsaPop Trashion was a good kick in the pants for me.  DIY has lately become widely seen as a “movement” and a serious form of fun and self-expression, and that's great, obvs.  But, more than that, it can also really empower us to reduce consumption in so many aspects of our lives, major and minor.  Not to get preachy or anything (eh, too late).  In any case, there’s so much good crafting material out there that doesn’t require any new production, and it’s extra satisfying to repurpose it to make something that we'll use and love.


I knocked out this simple pendant while sidetracked from crafting a late-to-the-party leather collar (soon to be blogged).  This is a nice little project for using up scrap leather (here, from a thrifted leather skirt), and it just takes a few minutes.

Wednesday, November 9, 2011

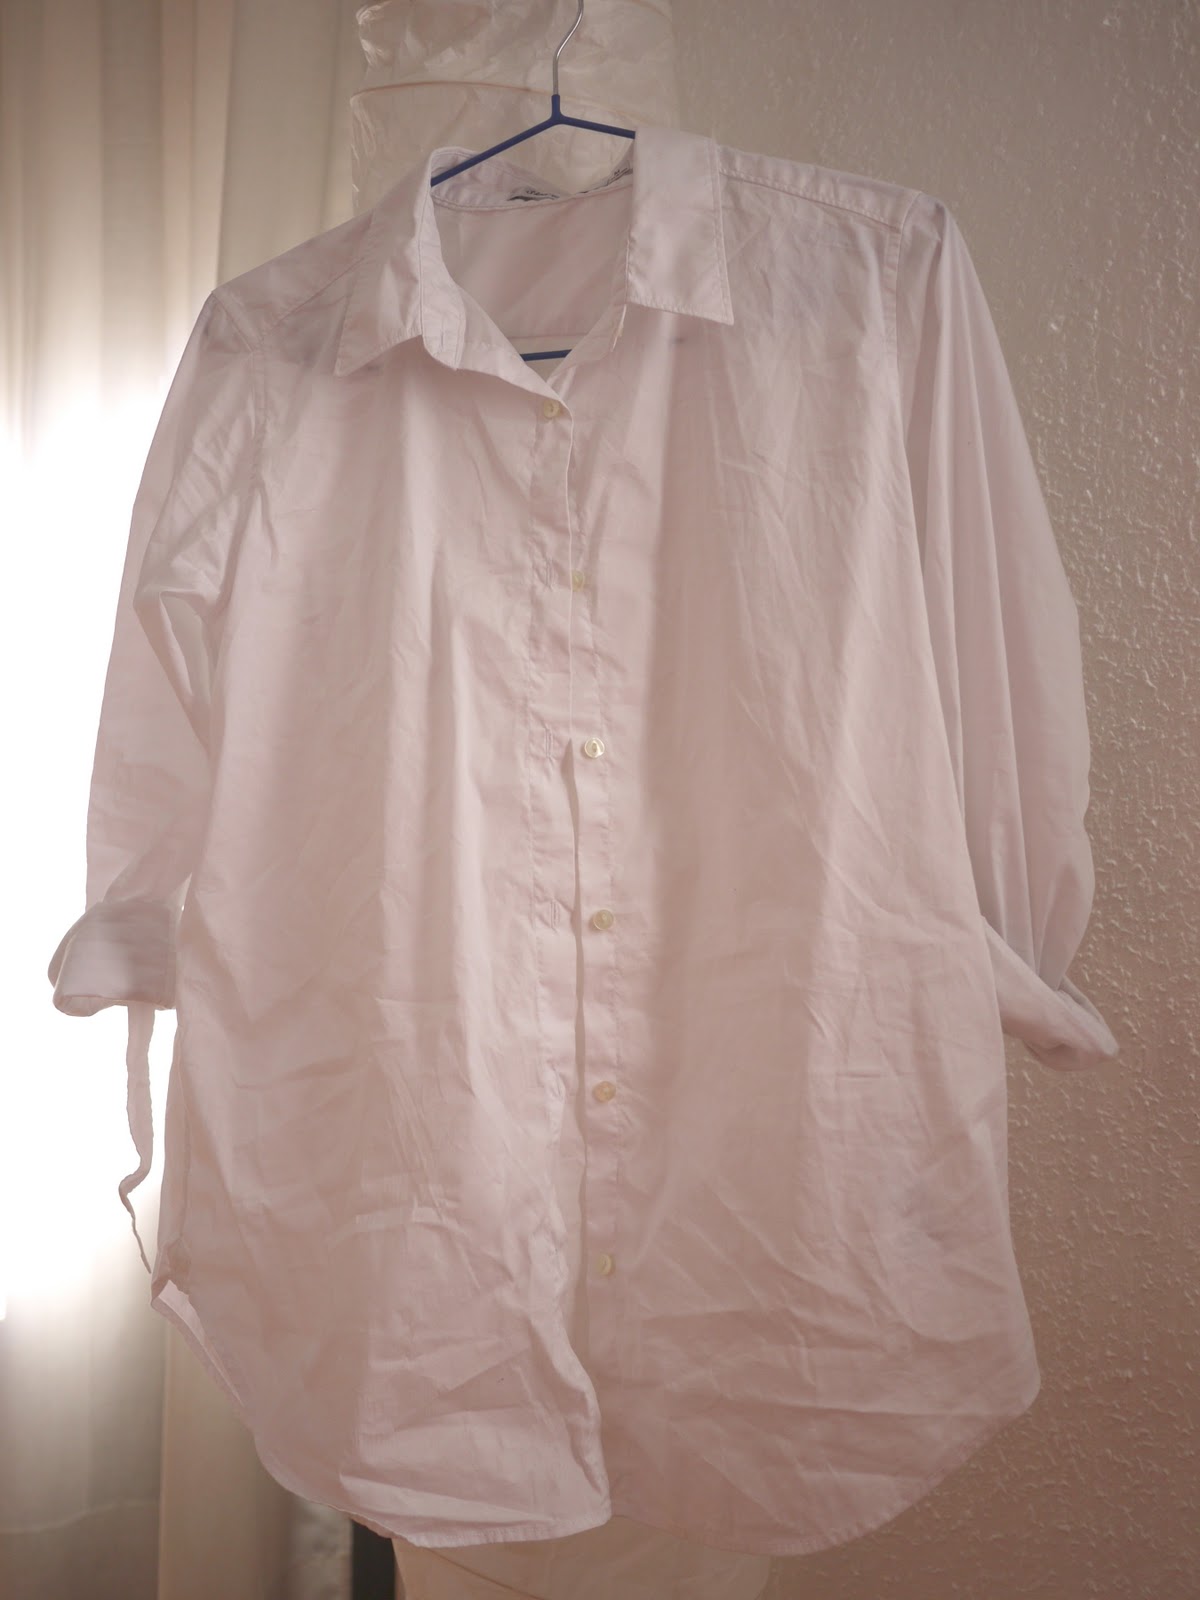
diy: refashioned white shirt

I recently ironed a hole in my favorite white boyfriend shirt (right before leaving for a job interview - sweet).  Sorry, buddy!


To salvage it, I chopped off the holey bit, around the last few buttons on the bottom, cutting my favorite angled hemline, sloped down towards the back.  Iron and stitch the hemline, done.  New shirt!

In further refashioning this shirt, I was inspired by this lovely Honestly WTF DIY from earlier this year and the abundance of black lace I had lying around from this project.  To adorn a collar with lace, simply lay a small piece along the tips however you like and glue it into place.  Fold the lace around the backside of the collar, cut off excess lace, and glue again to secure.  When you're happy with the positioning of the lace, stitch it down with the needle and thread (a step I have yet to complete).


The adorned collar, front and back.


The newly swingy shirt.  I couldn't get a great pic of it in action, but it's been quite a wardrobe workhorse so far, good paired with high-waisted bottoms and peeking out from crewneck sweaters.

Saturday, October 29, 2011

diy: leather bracelets

My apologies for the unplanned and extended blogging break.  It's amazing how much energy it takes to adjust to an entirely new environment - new home, new language, new job.  I've begun teaching in law firms and various corporations...so fun!  And now, with a fair amount of control over my work schedule, I have plenty of time to pursue my own projects.  Without getting too cornball on you guys, I must say that the big changes of late have given me an entirely new perspective on how to use my time (my most precious commodity).  This exercise in living - not just thinking - a little bit outside the box has been tremendous so far, and I'm just so thrilled and grateful for the opportunity.

Enough!  Onto the DIY!  This is another one from before I left the U.S.: a truly simple and easily customizable bracelet recipe.  I made two, one with a single braid, and the other with beaded thread:


Here's how I put together the bracelet with the woven braid.

Monday, September 5, 2011

transition time

Sooo...after a long time of back and forth, lots of indecision, I've moved across the ocean to teach English as a bit of a career break.  Crazy as I thought it would sound to everyone in my world and buttoned-up profession, I've generally received nothing but support.  The last few days have been a whirlwind of moving out, moving in, lugging this and that everywhere, and busting out some mediocre Spanish (this is Spain, after all!) in order to get things done.

One of the major boo-boos about this move has been that I'll be without a sewing machine for at least a month.  Usually so organized, I did bring mine from home but forgot entirely about a wee problem relating to voltage/outlets/Europe.  Such a travesty.  It's true that my DIY time in this next month will be slim, as I'll be working through a pretty time-intensive training program, but I'll be popping into the blogosphere as much as I can and staying inspired.

For now, here's a glimpse of some high-waisted, thrifted silk shorts that I modified using Megan Nielsen's fab scalloped-shorts tutorial:


Rather than making a template on contact paper, though, I used card stock and traced the scallop design right onto the fabric, which worked well for me.  Anyway, I'll be wearing these until I can't reasonably milk the last traces of summer heat.  I've dubbed them the "Patrick" shorts because my scallops turned out a tad pointy and, for whatever reason, seem to me reminiscent of Patrick, that starfish from Sponge Bob.  Am I right?

Thursday, August 11, 2011

diy: a little edge

I love silk, especially in the summer.  It's true that it leads to wrinkleville, but I don't care.  I just love it.  Picking up thrifted silk blouses has been my latest thing, and I was drawn to the neutral color of this one, which I promptly restyled to my liking:


Though I liked the fabric and hue, the fit was off: as usual, the sleeves were way too long and the shoulders a bit too wide.  Solution: peace out, sleeves, and hello, bias tape!  Here's the original:


And details post-revamp:


I am suddenly overwhelmed by the possibilities presented by this refashioned blouse.  Knot in front and wear with denim shorts now!  Belt and wear over a mini!  Pair with a cropped sweater in the fall!  I clearly can't deal.  

This was so easy that I feel ridiculous laying out the steps, but here's what I did:

1) Remove the sleeves.  I just cut right above the seams, rather than carefully picking them out with a seam ripper.
2) Check for fit and make adjustments if needed.  In this case, the armholes were way too big.  So, under the arm, I slimmed the sides about half an inch.  I also sewed a gathering stitch right next to the shoulder seams - you just sew a line of long stitches where you want to gather the fabric, pull the bottom thread while smushing the fabric together along the thread until it looks good, and sew the loose thread into place (I also stitched over the gathering when I was done to secure it).  With this step, I was able to make the armholes smaller and add a bit of interest without having to get too precise with the armhole shaping. 
3) Sew on bias tape to cover the armhole and collar edges.  You can buy or make bias tape.  I made mine from some lovely raw silk I had lying around (I love how its nubbiness contrasts with the smooth silk of the blouse).  Just fold the tape in half, press, and stitch it right over the edges.  Make sure you fold the ends of the bias tape to the inside for a clean finish.  

Hooray for (relatively) quick fixes!

Saturday, July 30, 2011

petite fashion challenge #9 - heat wave (plus a little diy)

I'm a shortie, but not the most well-versed when it comes to petite styling.  However, I follow a number of bloggers known to drop some serious science in this department.  So when I came upon Petite Fashion Challenge #9, hosted by Elle at Fast Food and Fast Fashion, I thought it would be fun to give it a whirl.  Mission: to "create an outfit that accounts for the various environmental factors that plague us in the summer.  I want to know how you dress when it's 90 degrees outside and 65 degrees inside...."


65 degrees inside is right.  My window-free office is known to be downright breezy on some days, thanks to an overzealous vent whose air current is directed squarely at my noggin.  


For a foundation, breezy fabrics are mandatory.  I commute by train, and, thankfully, I live just a minute or two from the station.  DC is generally a soupy mess in the summer, though, so dressing ultra-light is still key.  This thrifted silk skirt and lightweight tank have been in heavy rotation this summer:


Thrifted silk skirt/belt/necklace, random old tank, Stuart Weitzman pumps (eBay)

To combat my frigid office conditions, I pulled the unoriginal move of throwing a blazer over the whole thing.  A little tangent to introduce the blazer I paired with this outfit: I've been on a micro-DIY kick lately, making small, easy modifications with relatively big impact.  My most recent obsession has been with leather trim.  So I married a beloved old Uniqlo blazer with a piece of scrap leather via Etsy, hand-sewing the leather around the existing pocket flaps:


This DIY hardly merits a real tutorial, but a few notes: 1) Use fabric glue to secure the leather to the flaps first and then concentrate on refining their shape as you sew the fabric to the back of the flaps.  2) Use a leather needle (hmm...I don't mean a needle made of leather...).


This blazer certainly imparts a fall feeling for me, and I can't wait to wear it in full-on tomboy mode later this year!  But when fall weather is upon us indoors in July, we do what we must.  


In case I was about to forget that navy+white and stripes have nautical connotations, I tossed my fave turtle necklace into the mix.  A little golden nod to marine life never hurt anyone, right?


Looking forward to seeing what the other challenge participants have come up with!  

Wednesday, July 27, 2011

diy: linen tee update

Inspired by this, I did a quick revamp on a ghastly-fitting J. Crew linen tee:


Behold the before.  See how it does nothing for me?


I just stitched on a bit of lovely gold trim at the top of the pocket, and to make the most of the ample, drapey fabric, I cut and sewed a curved hem (something I can't stop doing, as you'll soon see).  The new shape gives the fabric some much-needed swing.

This is the type of low-commitment, high-satisfaction project I'm going to try to do more of from now on.  When I first learned to sew, I became characteristically wild-eyed.  Hell yeah, why would I buy a trench coat when I could just make one?  Heh!  After some notable failures in the early days, I've accepted this fact: I just don't have the patience to produce, from scratch, a garment that I would actually want to wear.  I give couturiers serious props, but I'm happy to leave the heavy stuff to the pros.

But still, I need to make things.  I like sewing, just not for hours at a time.  And this is where a project like this one is such a treat: no fretting about precision, no grand technique.  Just a bit of hand-sewing and an easy hem, neat and simple, the way I like it.